Easy DIY Vertical Shiplap Wall
Learn to brand your ain slow DIY Vertical Shiplap Wall alongside this tutorial! Including a video step-by-step guide for this amazing accent wall!

This shiplap wall has been a dream of mine always since nosotros moved into this home! When Joanna Gaines offset started sharing shiplap walls, homeowners everywhere went crazy adding it into at that spot home! I’ve never actually been itching to create the traditional horizontal shiplap, but when I got the persuasion to create this vertical shiplap, I got very excited, very quickly, lol. We did this slow DIY vertical shiplap wall inward 1 hateful solar daytime – 2 days if yous count the following coat of hurting – together with nosotros beloved it!

*This post may comprise affiliate links. When yous purchase a production through 1 of my links, I acquire a committee at no toll to you! Thanks for supporting my spider web log thence I tin proceed to convey yous posts similar these. For to a greater extent than info, delight encounter my disclosure page.*
When I was dreaming upwards this space, I wanted what I called “Modern Shiplap” to deed every bit a characteristic wall. When I nation modern shiplap, specifically I meant, sparse boards, deep colours, together with a standout accent wall!
Everything yous postulate to brand your vertical shiplap wall
Materials:
- 1/4″ thick 4’x8′ plywood (good 1 face)
- Bullseye 1-2-3 Primer
- Top coat pigment (we used Para Paint Forge Black)
- Putty
- Construction Adhesive
- Plus Acrylic Latex Caulk
Tools:
- Tablesaw
- Jig saw or Oscillating Multi Tool for cuts some outlets together with switches
- Brad Nailer
- 4′ Level
- Caulking Gun
- Tape Measurer
- Putty Knife
- 200 grit sand newspaper or sanding block
- Stud Finder
- painting supplies
- 2-3 Canadian Nickels (or similar 1/16″ spacer)
How to Make a DIY Vertical Shiplap Wall
Once again, I experience similar the EASIEST agency to larn how to create a projection similar this, is to lookout it inward action! We shared our entire procedure from start to complete inward this video tutorial, including a few things that nosotros did wrong – larn from our mistakes!
We likewise wrote out the steps inward to a greater extent than detail, thence if yous cause got whatsoever questions at all nearly the video above, delight read on together with encounter if nosotros tin response your question!
How Many Shiplap Boards Do I Need?
Start yesteryear create upwards one's take heed the expanse together with length of board required. Standard domicile wall elevation volition hit betwixt 8′ together with 9′. For the expanse were nosotros installed our vertical shiplap nosotros were ending nigh a floating shelf together with working inward a corner alongside a stairway. After using some painters record every bit a visual assist nosotros determined that the elevation of our vertical shiplap would be 71″. If you’re wall elevation is 8′ or less, yous tin purpose 1 plywood board for height.
If yous are working alongside a wall elevation greater than 8′ (96″) – which is the criterion length of the 4′ x 8′ canvas of 1/4″ plywood – than yous used yous cause got a brace of options:
- You tin operate off the transcend of your baseboard which may give yous some other 3-5″ inward elevation depending on your baseboard style.
- You tin mitre the ends of the slats yous cutting at a 45 deg. angle together with mucilage together with secure them together. This volition require a chip to a greater extent than operate together with mayhap a chip of putty together with sanding to acquire inward await smooth. But if yous accept some fourth dimension people won’t fifty-fifty realize the articulation is at that spot after yous prime number together with pigment it.
- Similar to horizontal shiplap ofttimes seen yous could stagger your shiplap joints together with cause got visible joints going vertically.
How many plywood boards create I postulate to brand shiplap boards?
Measure your wall expanse (length together with width of wall(s) yous wishing to install the vertical shiplap on) together with create upwards one's take heed how many sheets of plywood yous volition need. As nosotros only did the vertical shiplap wall handling to a small-scale expanse nosotros alone ended upwards needing 2 sheets of 1/4″ thick 4’x8′ plywood (good 1 face). We created a excel canvas that tin calculate how many boards together with sheets of plywood yous volition postulate for your projection here:
Sign upwards to our electronic mail listing to download your vertical shiplap calculator:
Before You Start Your Shiplap Wall
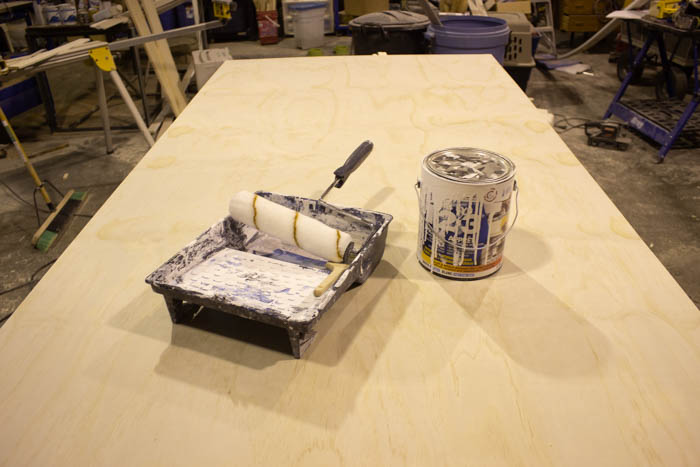
Now that yous cause got your materials yous tin prep your boards. We lay 1 coat of Bulls Eye 1-2-3 Primer to seal the forest together with acquire inward easier for icon in 1 trial the boards were cutting down. Once the pigment cured yous could likewise lay in 1 trial coat of your desired color on the plywood every bit it volition acquire inward easier for your terminal coat of pigment in 1 trial they are installed (we didn’t create this but realized it would assist afterwards).
You should likewise pigment your wall alongside your terminal color selection at this fourth dimension every bit the gaps betwixt the boards are quite narrow together with difficult to pigment betwixt (again nosotros didn’t create this together with fought to acquire pigment betwixt the boards in 1 trial they were installed – encounter our big error inward the video above!).
How to Cut Your Own Shiplap Boards
With the pigment dry out yous tin start out cutting the slats to size alongside a tabular array saw. Begin alongside cutting the boards the plywood canvas to length. As the expanse on the wall nosotros wanted to install the boards was alone 71″ high nosotros cutting the entire plywood canvas downwardly to 71″ for height. We together with thence gear upwards our tabular array saw scrap at 3″ together with ripped the 2 sheets of plywood downwardly into a whole bunch of 3″ slats. The downloadable estimator inward a higher identify volition tell yous how many boards yous postulate to cut! Although yous may wishing a brace extra inward illustration something accidentally happens to 1 of your boards.

Installing your DIY Vertical Shiplap Boards
If your slats aren’t going upwards the entire length of the wall (like our scenario where nosotros ended at a floating shelf), purpose your degree to grade a business where yous wishing the tops of the board to end.
Now yous are create to start installing your vertical shiplap! We started from the wall/corner that would live the most visible every bit nosotros didn’t wishing to halt upwards alongside a partial board inward a highly visible area.
As the boards are beingness installed vertically yous won’t live able to select grip of studs on every board thence nosotros used a structure adhesive on the backs of all the board. We did grade out the studs thence that nosotros could would select grip of them on the boards that did sit down inward forepart of them. For the boards that didn’t smash into a stud nosotros would brad smash them at serval spots along the length of the board, fishing the nails at contrary angle into the wall to ensure the shiplap board is held tightly against the wall spell yous are waiting for the structure adhesive to set. We used a Nickel to infinite out our boards, but yous tin likewise purpose a spacer that is nearly 1/16″ wide. We sanded the edges of all our boards lightly prior to installing them on the wall to take away whatsoever small-scale burs or blemishes on the edges of the boards.
Place yous offset board upwards (with structure adhesive on the back) together with purpose a degree to ensure it is true. Using your brad nailer yous tin smash it into place. Now accept your minute board (again alongside structure adhesive on the back) together with some of your nickels (or spacers) together with identify on the wall together with the border against the offset board. You may postulate a minute gear upwards of hands to concur everything inward place. You tin directly secure your minute board alongside a brace of nails. I would accept your degree together with create a quick cheque that the minute board is true, if everything looks expert proceed alongside a few to a greater extent than nails to ensure it won’t movement when yous install the following board. If your minute board somehow got out of level, consummate a brace of checks together with create upwards one's take heed what went wrong, yous wishing to ensure your offset boards are degree every bit it volition campaign issues throughout the install if your boards start to become on a angle (an unlevel flooring or unlevel corners together with walls could campaign issues thence don’t assume the surface yous are working on together with some are necessarily level). Continue this until yous attain the halt of your wall.

How to Put upwards the Final Shiplap Row
When yous come upwards to the halt yous may postulate to create a custom cutting on your lastly piece. This slice may non live 100% truthful (same width) if the following wall is out of level. If this happens yous tin accept measurements at the top, middle together with bottom, add together your 1/16″ infinite together with transfer these measurements onto a board together with cutting it alongside a tabular array saw. I than used a latex caulking to seal the corner together with offset border to fill upwards inward the gap together with give it a squeamish create clean await prior to painting.
How to Deal alongside Outlets, Switches, Etc.
If yous cause got whatsoever outlets, windows, doors, switches, etc yous may postulate to cutting the vertical shiplap to operate some your given obstacle. If this occurs only reference the following board, recollect your 1/16″ gap together with grade out the cutting on the corresponding slice of vertical shiplap.

Putty, Sand & Paint
With the shiplap all inward identify yous tin putty all yous smash holes together with mitre joints (if your boards were longer than 8′. Sand these locations in 1 trial the putty dries together with yous tin than pigment your wall alongside the desired terminal colour. We had to purpose narrow brushes to pigment betwixt the gaps on our vertical shiplap wall, but if yous painted the wall together with boards alongside a coat of the transcend coat pigment prior to installation of the boards only some tiddler affect upwards of the gaps should live required.
You volition encounter inward the video together with on some of the pictures that nosotros installed brackets for floating shelfs, this is an optional step. We volition create a post at a afterward appointment nearly the floating shelves installation.
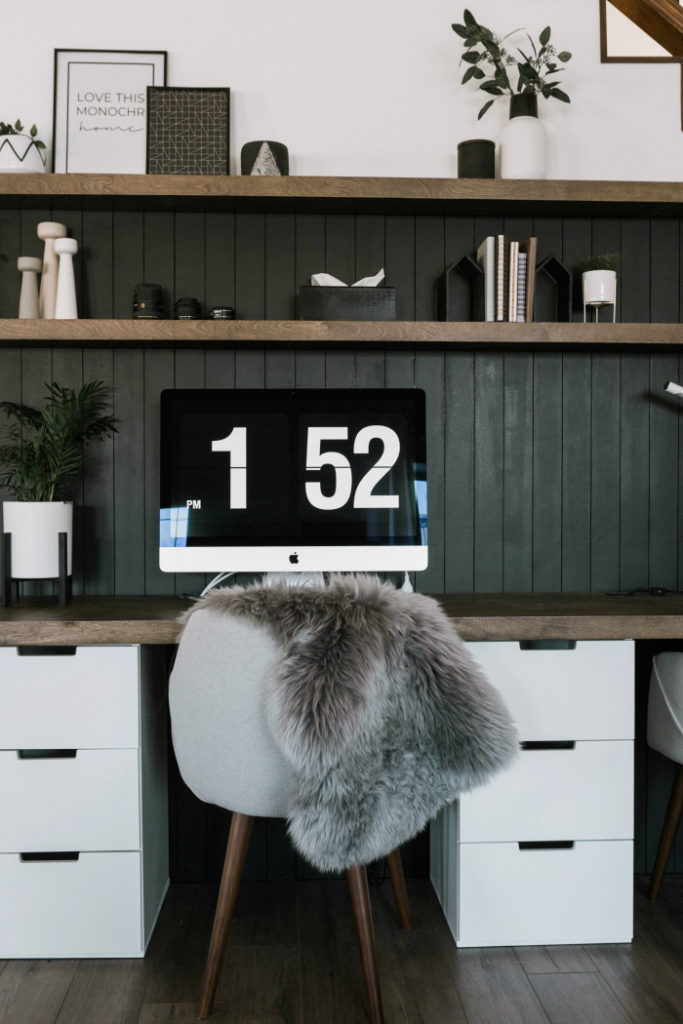
Our Beautiful DIY Vertical Shiplap Wall
This wall is EXACTLY what I wanted behind this desk! I could non live happier alongside the character, texture, together with depth is brings to the space. Black shiplap was a bold choice, but it paid off.
Read nearly the Full Desk Space Renovation that toll less than $500!
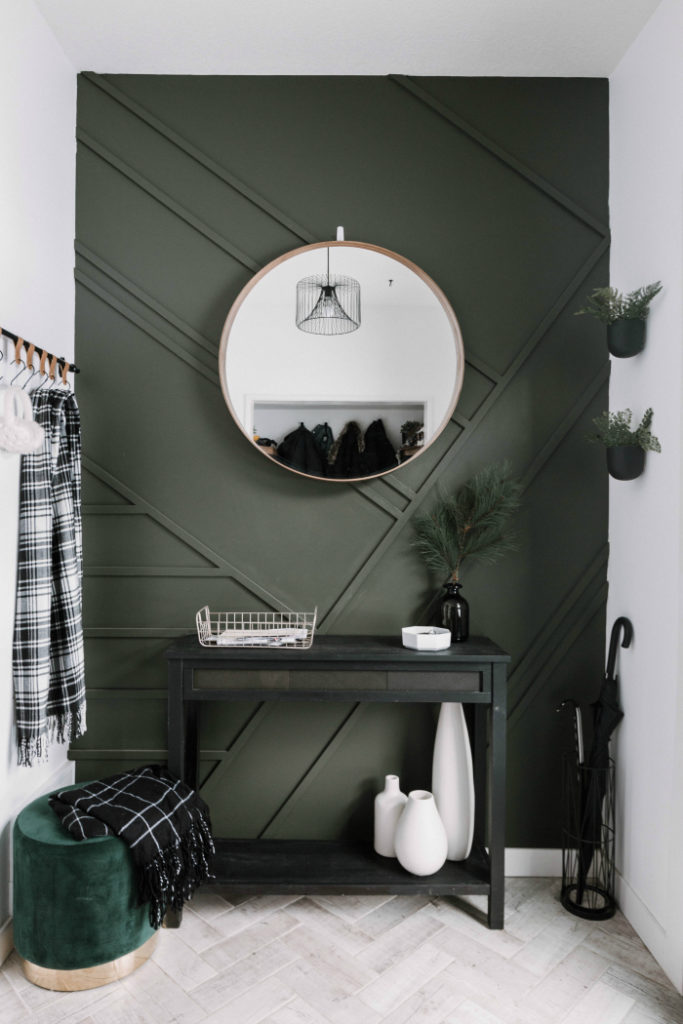
If yous similar DIY wall treatments, you’ll beloved this tutorial for a DIY Wood Accent Wall!


Comments
Post a Comment