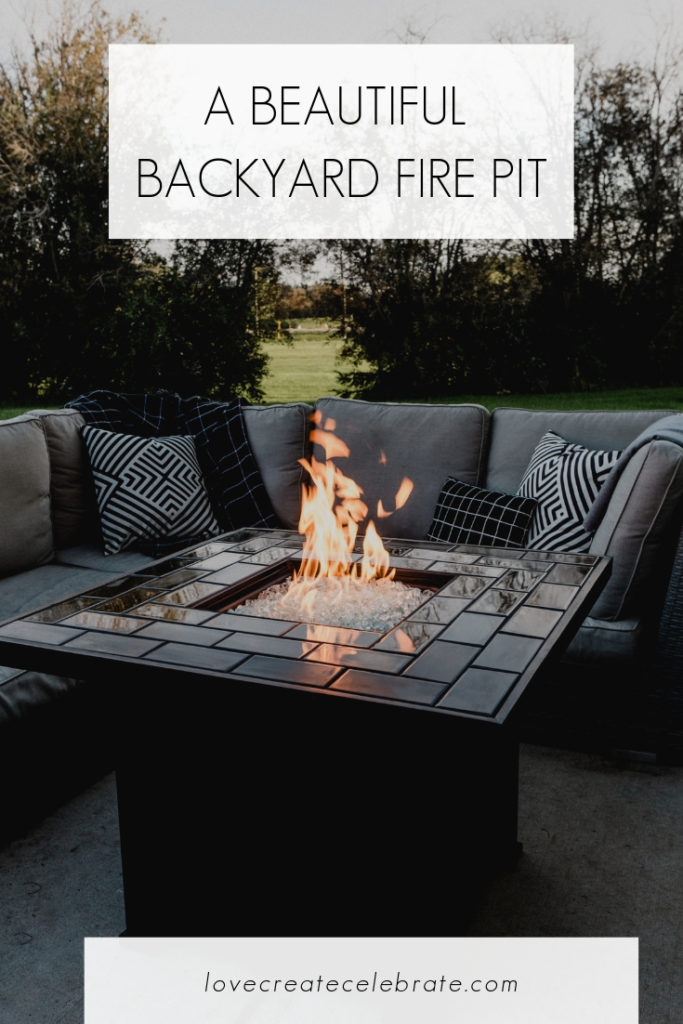
A Beautiful DIY Fire Pit
A beautiful DIY burn pit for whatsoever outdoor infinite or backyard oasis! Update an quondam propane burn tabular array alongside this slow tutorial!
Weather wise, this has been i of our worst summers. It’s been soooo rainy. Clouds inwards the sky, kids stuck inside, lawn needing to live mowed every week. We had grand plans for getting some amazing summertime projects done, but our atmospheric condition stopped us from getting most of our plans done. The nighttime that this burn pit was ready was honestly the outset nighttime that really felt similar summer. It had finally been dry out plenty for our outdoor cushions to dry out off, nosotros poured some wine, as well as nosotros sat past times our outdoor fire, soaking upwards the evening. You tin get got a beautiful DIY Fire Pit also – it’s easy, as well as yous won’t regret it!
*This ship service was sponsored past times Jeffrey Court Home Depot. As always, opinions are 100% my own. For to a greater extent than information, delight come across my disclosure page.*
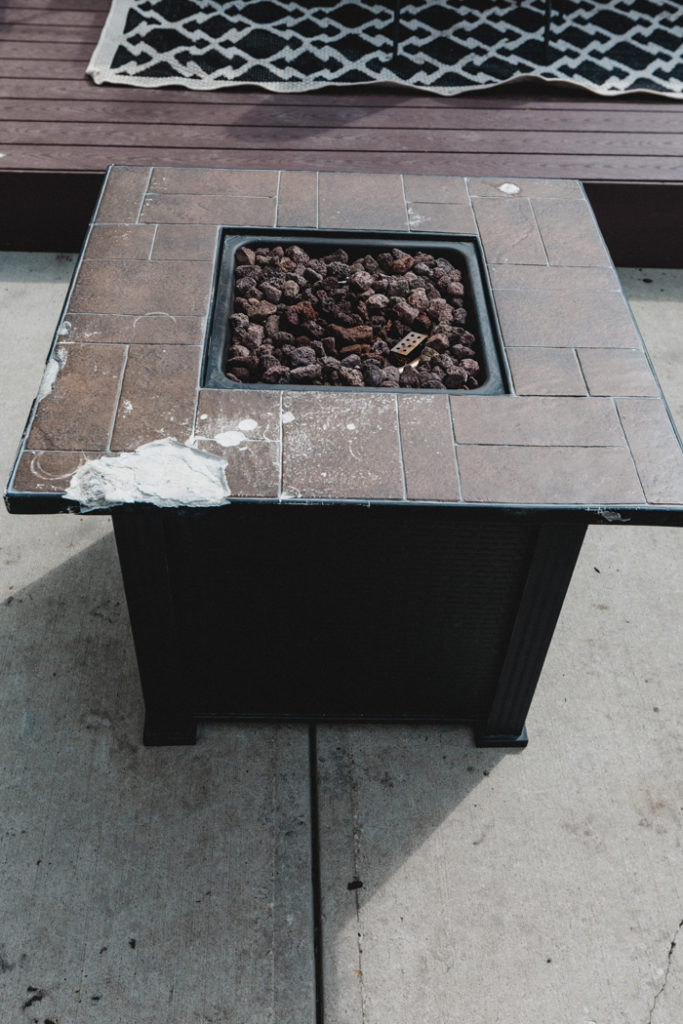
This is the slice that sparked the whole project. If yous look, you’ll ever abide by people selling perfectly good things, for a lot less! Especially on Kijiji or Craigslist. This tabular array was inwards dandy working guild – it but had some harm to the overstep of it.
When nosotros bought it, nosotros alone saw photos online, thence nosotros truly idea that the stuff on overstep was broken tile. Or conception was to take as well as supplant the tile. As it turned out, the overstep was non tile at all, thence nosotros came upwards alongside a conception B.
Plan B was to tile overtop of the existing burn pit tabletop. All of the “holes” would live filled alongside thinset equally nosotros tiled.
Materials Required
- Old Propane Fire Pit
- Thinset
- Black Tile
- Black Grout
- Clear Fire Glass
- Black Tile Edging
- Black Spray Paint
- Tile Sealer
Tools Required
- Trowels for Tiling
- Mitre Saw
- Wet Saw (possibly)
- Drill

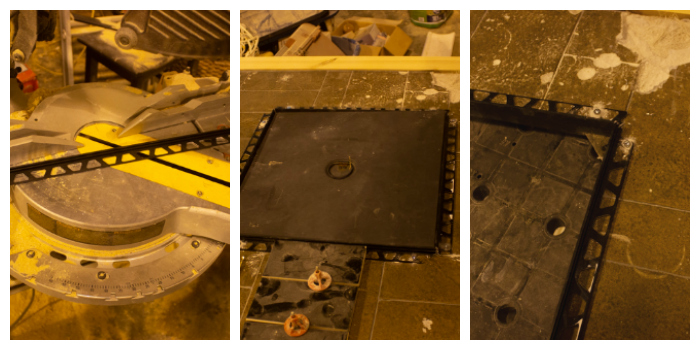
Building a Frame For Your DIY Fire Pit
The outset matter nosotros did was build a novel frame for our burn pit. This stair is completely optional. If yous await at the outset photograph inwards the collage above, yous tin come across that out currently tabletop was non broad plenty for 3 total rows of tiles. You tin easily role a moisture saw to cutting downwards your tiles too, which volition brand the transformation that much easier!
For the frame, nosotros cutting downwards 2x4s. We measured the exact width nosotros needed to add together a 3rd row of tiles (plus 1/8″ spacing betwixt each tile). We planed the board thence that it was the same width equally our tabletop – that agency nosotros could add together tiles across the frame as well as electrical current tabletop as well as they would live the same height.
We added an border to cover whatsoever imperfections on the side of the burn pit tabletop, as well as thence nosotros stained the whole frame alongside a black Ebony stain, as well as thence protected it alongside a polyeurethane (to protect for outdoor use).
When nosotros were ready, nosotros used construction adhesive to adhere the tabletop to the frame.
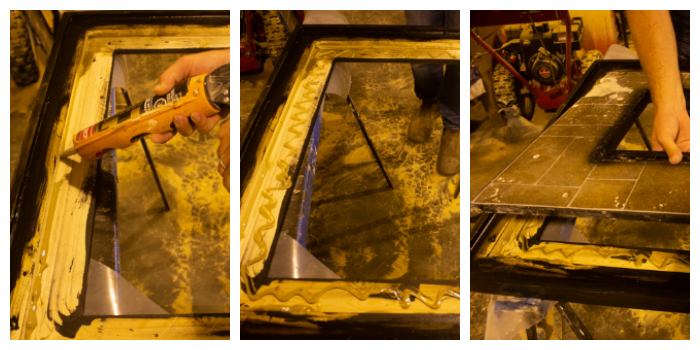
Adding Edging to Your DIY Fire Pit
The agency to teach the best await on whatsoever tile chore is to add together beautiful edging pieces. You tin purchase dark tile edging at your local tile store. We bought plenty for the within border of our DIY burn pit tabletop, but if yous are non making a frame, yous volition also bespeak plenty for the exterior edge.
Cut your edging to the same length of each of your edges, as well as cutting take on the within edges, but brand 45 marking mitre cuts on your mitre saw for the exterior border if yous bespeak them.
To a dry out gibe to brand certain that your edging pieces all fit, as well as thence role a drill as well as screw right into the tabletop to concur them inwards place.

Tiling Your Backyard Fire Table
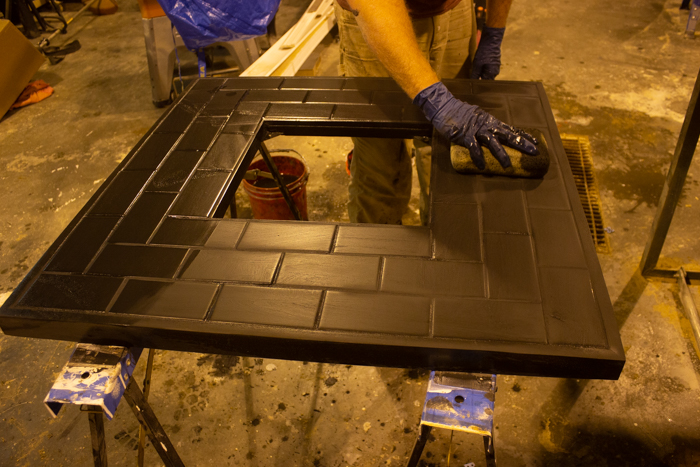
The lastly stair is to tile as well as grout your table. We used this beautiful glossy dark tile for our tabletop, as well as added a dark grout to consummate the modern look.
Add sparse laid to the entire tabletop as well as to the backs of your tiles equally yous house them. The glossy tiles tin live easily scratched, thence role a soft spacer, or live careful non to tighten the tops of your spacers also much or they may scratch your tile surface.

When the entire tabular array is tiled, permit it residual for 24 hours thence that everything tin laid properly. The side past times side day, create clean the dried sparse laid off of the surface as well as thence mix your dark grout.
Add grout betwixt all of your tiles. Make certain to wipe off your tiles as well as grout earlier it sets or it volition live really hard to take later. There should but live a hazy celluloid of grout left on the tiles when yous locomote out it for the night. You tin take the hazy celluloid the side past times side day.
The lastly stair is to seal your tabletop. Since this is going to live an outdoor table, as well as get got a lot of article of apparel as well as tear, yous bespeak to brand certain that yous protect it properly.

The lastly step, which yous truly tin practise anytime at all! Is to spray pigment your base. Your base of operations may non bespeak to live freshened up. Ours had a flake fo a rustic await to it, alongside a mix of chocolate-brown as well as grey, as well as I wanted to spray pigment it to teach inwards await black, as well as equally fresh equally the residual of the burn pit.

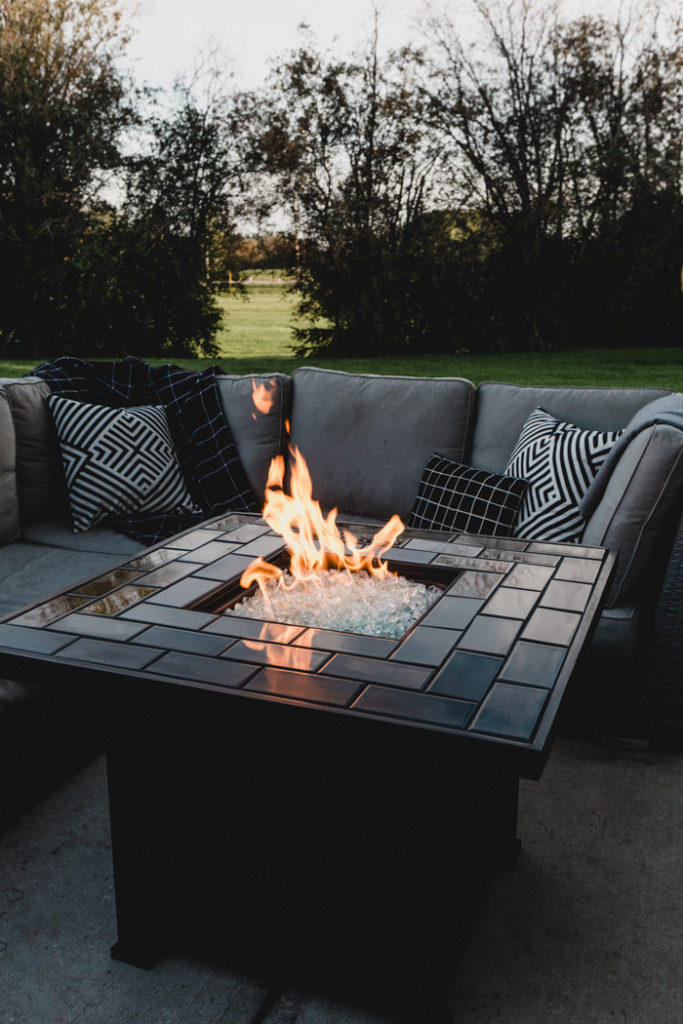
Here is the earlier as well as after of the burn pit! when yous come across them side past times side, yous tin truly come across the divergence that the glossy dark tile makes! It reflects the burn thence beautifully!
Our Finished Backyard Fire Pit
Bahhhhh!! I could non dearest this more! I cannot fifty-fifty limited how much this unproblematic slice transformed our backyard. The burn pit looked pretty petroleum when nosotros outset got it, as well as nosotros completely transformed it into something modern, beautiful!
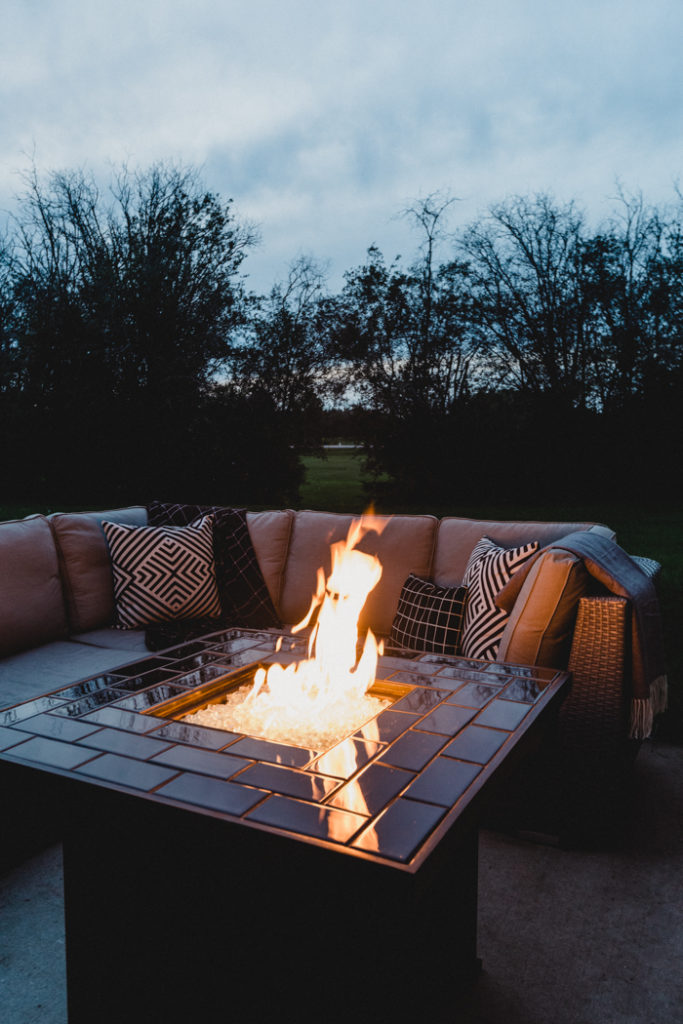
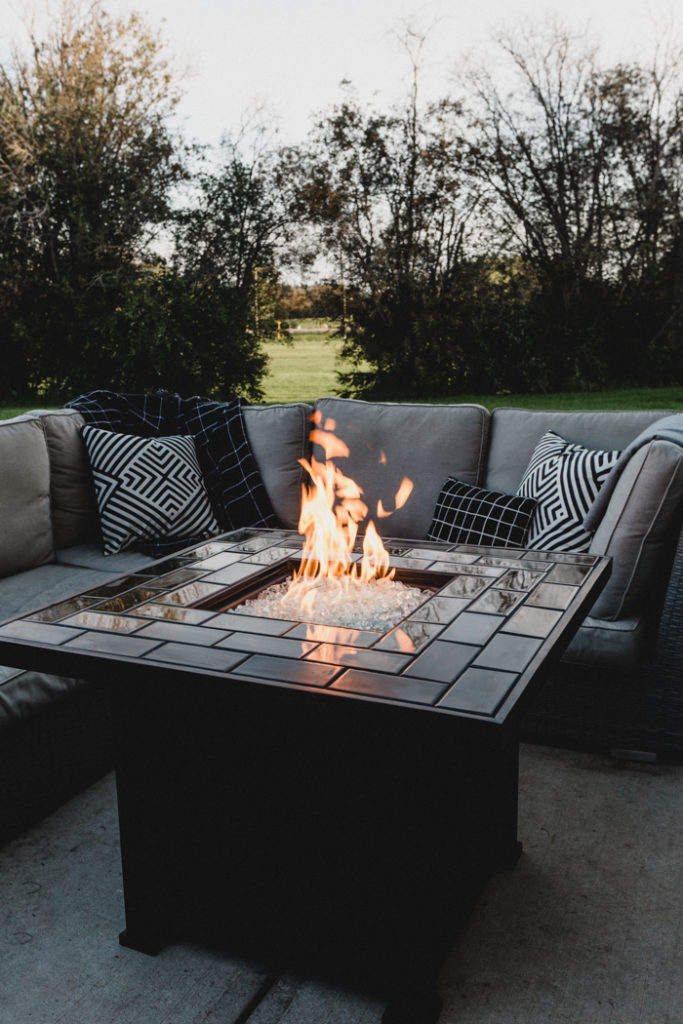
The white drinking glass against the dark tile is stunning! I’m thence glad that nosotros went alongside dark tile as well as dark grout.


DIY Fire Pit
Yield:
1
Active Time:
6 hours
Total Time:
6 hours
Difficulty:
Medium
Estimated Cost:
$200
A beautiful DIY burn pit for whatsoever outdoor infinite or backyard oasis! Update an quondam propane burn tabular array alongside this slow tutorial!
Materials
Old Propane Fire Pit
Thinset
Black Tile
Black Grout
White Fire Glass
Black Tile Edging
Black Spray Paint
Tile Sealer
Tools
Trowels for Tiling
Mitre Saw
Wet Saw (possibly)
Drill
Instructions
Start past times removing whatsoever existing burn rocks/glass, disassembling the burn pit as well as removing the tabletop from the base of operations thence that yous tin easily operate on the piece.
Add Edging
- Cut tile edging alongside a mitre saw thence that it fits on the edges of your burn pit tabletop.
- Use a drill to secure the edging to the table
Tile the Tabletop
- Add tile to the tabletop using thinset.
- Use the wet-saw to cutting tiles equally needed.
- Allow 24 hours for thinset to set.
- Grout the spaces betwixt the tiles after tiles are set.
- Allow grout to laid for 24 hours.
- Seal grout lines (as this volition live an outdoor table).
Fix Base
- If your base of operations needs it, yous may pick out to spray pigment the metallic alongside a fresh coat.
Reassemble
- Attach the base of operations of your burn pit to the newly tiled tabletop.
- Test to brand certain that they burn pit is nonetheless working correctly.
- Add clear burn drinking glass to the centre of the burn pit.
Notes
Re-framing the Fire Pit
As noted inwards the ship service above, nosotros re-framed the tabletop earlier nosotros tiled it thence that nosotros would get got the await of 3 total rows of tiles as well as non get got to cutting whatsoever tiles.
This stair was alone personal preference, as well as is non needed for the projection to live completed.
Recommended Products
As an Amazon Associate as well as fellow member of other affiliate programs, I earn from qualifying purchases.

If you’re looking for beautiful outdoor projects, displace these Modern Summer Dollar Store DIYs!


Comments
Post a Comment