House Bookshelf

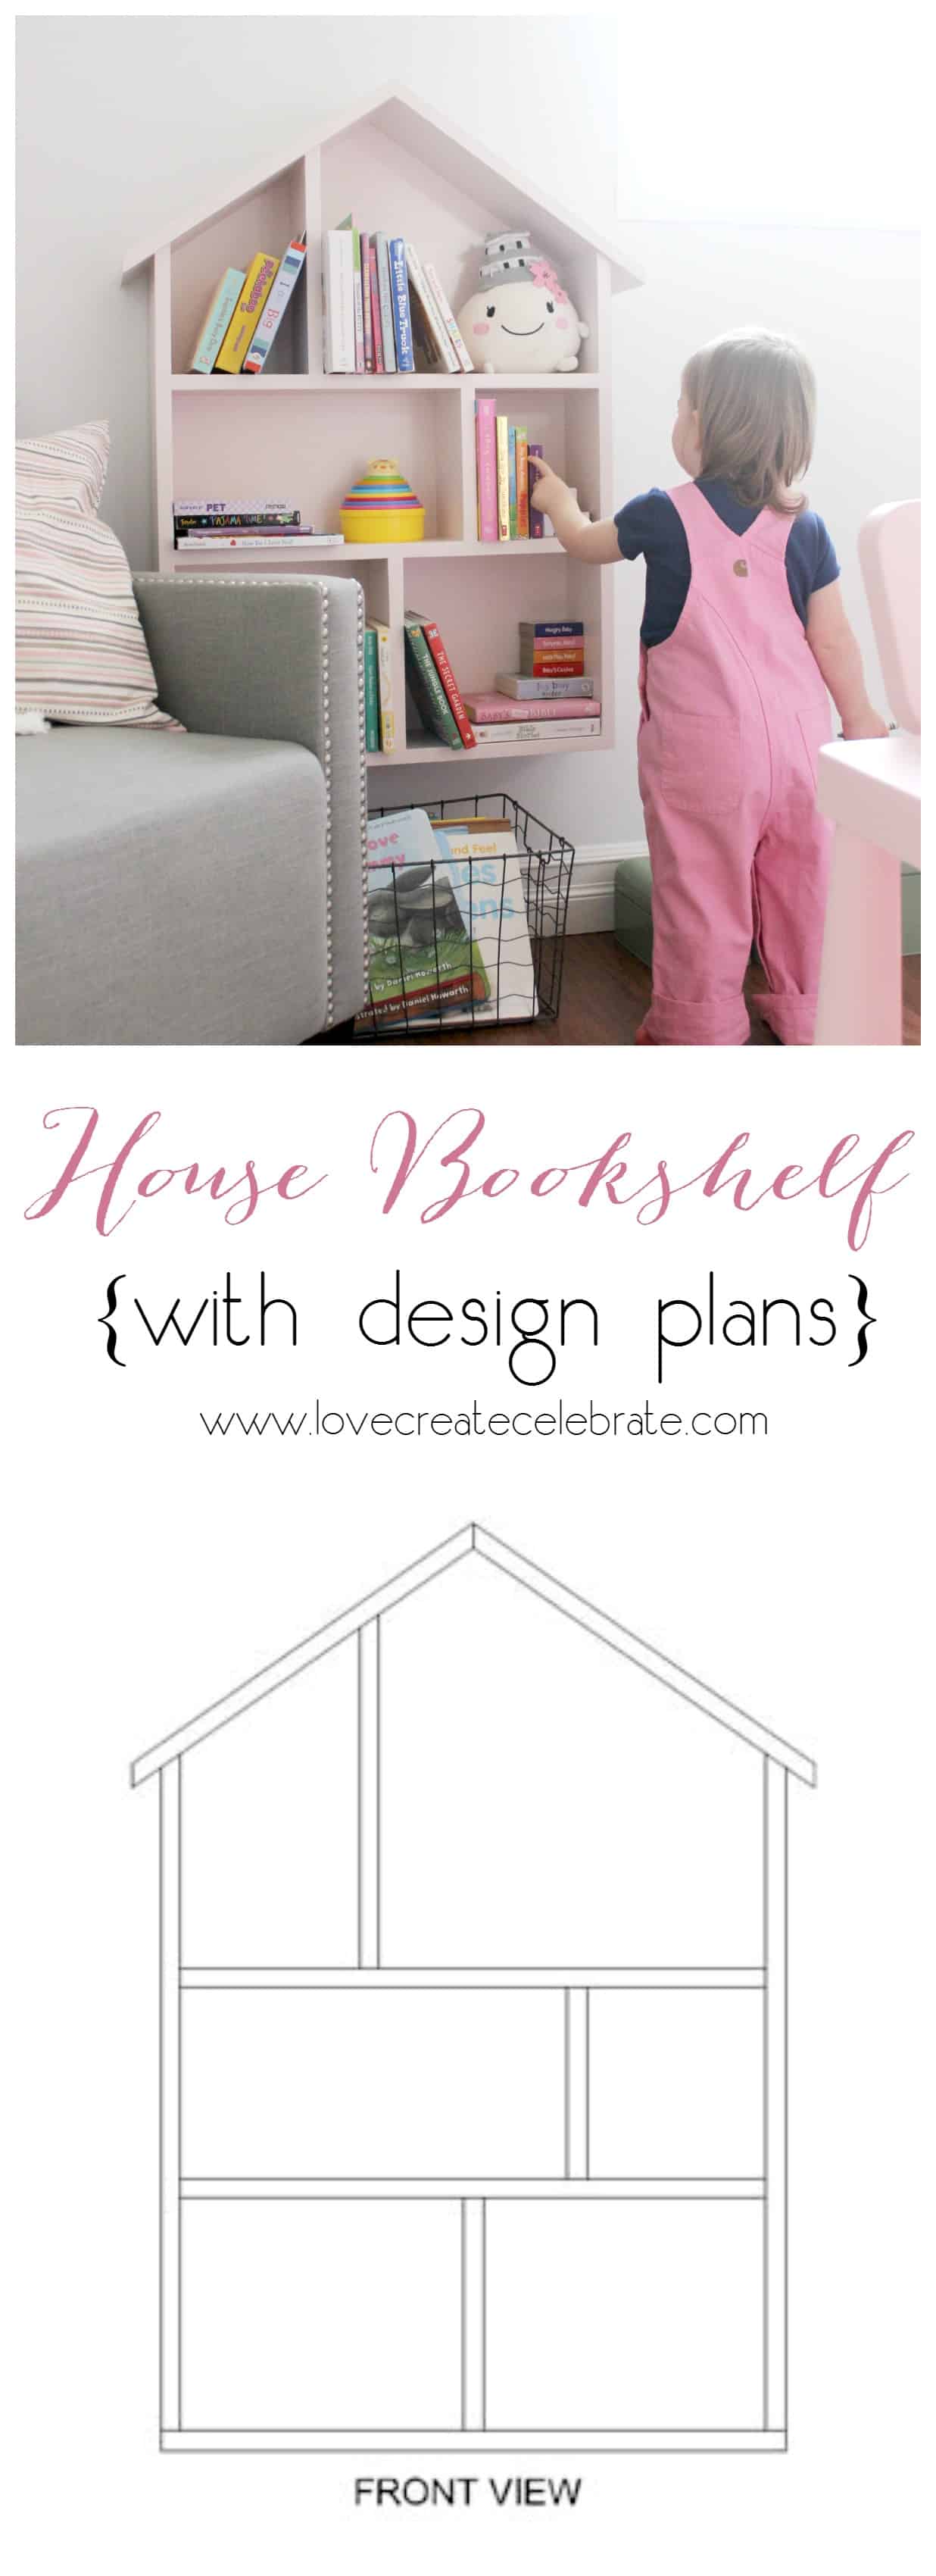
I direct keep some other SUPER exciting projection to part alongside you lot today! I’ve seen a few house-shaped bookshelves inwards stores before, similar this 1 at Restoration Hardware, in addition to thought, “Pffftt…. I could brand that for way less!”. And in addition to hence I did! lol. We needed a novel bookshelf for my daughter’s Big Girl Bedroom, in addition to and hence her House Bookshelf was born.

It started, equally all expert wordworking projects do, alongside a sketch on an former notepad :)
Here’s what you lot demand to create this projection at home:
Materials
- 3/4″ thick MDF – nosotros bought a 4′ x 8’sheet exactly solely used to a greater extent than or less 25% of it for this project
- Wood screws
- Glue
- Paint – nosotros used Behr Vienna Lace
- 4’x4′ canvas of 1/4″ thick plywood
- Drywall filler
Tools
- Table saw
- Router tabular array (to cutting grooves) tin give notice role tabular array saw equally well [optional – for the advanced woodworker!]
- Drill press or drill
- Sander
- Measuring tape
- Square (ruler)
- Putter knife
- Hammer
- 3/8″ Forstner bit
- 3/8″ Claw Wood Plug Hole Cutter Drill bit
Please ensure proper security equipment in addition to protection are used at all times when treatment ability tools in addition to completing this woodworking project.
1. Download identify edifice plans [above]
2. Cut pieces equally per the attached plans
3. Lay pieces out in addition to dry out gibe together (to double-check shape in addition to measurements), you lot tin give notice role clamps to agree inwards place.

4. Pre-drill holes alongside a 1/8″ diameter bit for all your screw hole locations [Note: MDF is prone to splitting if screw holes are non pre-drilled, in addition to hence you lot wishing to ensure holes are drilled deep enough]. We drilled ii holes per side of each board.
5. Counter-sink the holes alongside a 3/8″ Forstner bit; 1/4″ deep
6. Cut grooves inwards the dorsum of the perimeter pieces 1, 2, in addition to seven [circled inwards the attached plans] to agree the 1/4″ thick plywood inwards place. Alternatively, you lot tin give notice cutting a slice of 1/4″ thick plywood to gibe the dorsum alongside no groove, nonetheless you lot volition demand to prep the edges alongside filler to complete nicely.

7. Assemble pieces 1, 2, in addition to 7. Glue in addition to screw them together.
8. Assemble slice 6 in addition to iv together. Glue in addition to screw them together.
9. Assemble slice 5, 6, in addition to three in addition to iv together. Glue in addition to screw them together.
10. Assemble steps “7.” and “8.” together.
11. Assemble steps “6.” and “9.” together.

12. Install 1/4“ plywood backing.
13. Cut 3/8″ diameter plugs to fill upwards the counter sunk holes drilled alongside a 3/8″ Claw Wood Plug Hole Cutter Drill bit.

14. Fill holes alongside plugs from pace “13” and gum inwards place.

15. Once gum is dry out sand plugs level, role drywall filler to prep all edges in addition to whatever blemishes.
16. Complete a concluding sand, prime, in addition to pigment to desired finish.

We painted our bookshelf alongside a really soft pinkish – Behr’s Vienna Lace – which was perfect for our daughter’s Big Girl Bedroom!
I’m SO happy alongside how it turned out! Our immature adult woman truly puts her books away straightaway too, although she definitely prefers to direct keep them off of the shelf, lol.


Let me know what you lot think!
If you lot e'er brand this shelf yourself, I’d LOVE for you lot to tag me on Instagram so that I tin give notice run into your projects also :)
See to a greater extent than non bad DIYs inwards our daughter’s Big Girl Bedroom here.


Comments
Post a Comment