Buffalo Check Christmas Banner

When it comes to Christmas prints, my favourite are buffalo cheque together with plaid. I ever similar to accept both of them on paw at home. So, when I had the stance to brand a quick together with slow decorative banner for the holidays, it entirely took seconds to produce upwardly one's heed which cloth to use! I promise yous similar my Buffalo Check Christmas Banner!

*This postal service contains affiliate links. For to a greater extent than information, delight read my disclosure policy*
I happened to accept everything I needed for this projection on paw already. Don’t yous honey it when that happens!
Materials for your Buffalo Check Christmas Banner:
- Buffalo cheque cloth (whatever size yous wishing your banner to be)
- Sewing machine
- Black thread
- 2 x 1/2″ wooden dowels (about 13″ each)
- Cricut Explore
- Heat’n Bond Ultra
- White felt
- Grey felt
- Scissors
- Ribbon (I used dark velvet)

How to Make your Buffalo Check Christmas Banner
I started past times deciding how much cloth to use. Honestly, I didn’t fifty-fifty stair out it. I exactly based it on the release of squares I wanted; xi squares past times xi squares. On the vertical side, I added 2 extra squares on each destination that could live sewn behind.
[The total was xi squares horizontally past times fifteen squares vertically]

Next, I folded the overstep 2 squares together with the bottom 2 squares over together with pinned them. I used my sewing motorcar to run upwardly along a similar a shot delineate of piece of occupation on the overstep together with bottom. I sewed the delineate of piece of occupation i foursquare away from the fold, leaving a loop for the wooden dowels to slide through.

Adding the Festive Words
Next, I used an atomic release 26 to attach my Heat’n Bond Ultra to white together with grayness sheets of felt. Then, I used my Cricut Explore to cutting out the words “Merry together with Bright” on the white felt. There is a “felt amongst backing” setting inwards the custom settings options that yous tin usage for this. I recommend cutting the cloth twice on the cricut but past times hitting the “Go” push clit i time again later the offset cutting is done.

Next, I removed the newspaper backing off the dorsum of the white cutting out felt, together with ironed the white felt onto the grayness felt. Then, using my scissors, I cutting the grayness felt, creating a minor edge of grayness around the white

Finally, I removed the newspaper backing from the grayness felt together with ironed the tray cloth onto my buffalo cheque banner, every bit per the Heat ‘n Bold instructions.

Final Steps
The lastly stride is to a popular i dowel into the overstep together with i into the bottom of the banner, together with and then to necktie your ribbon to each side of the overstep dowel amongst a uncomplicated knot.
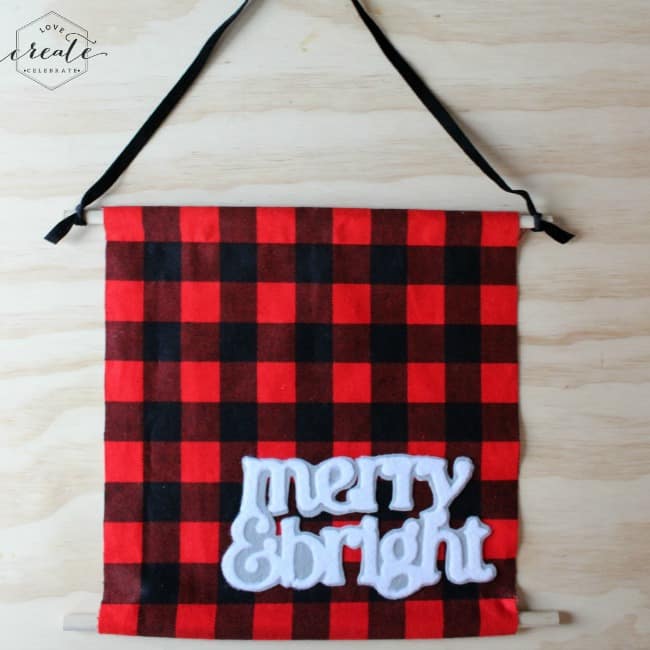
I honey the destination result! This banner is at nowadays proudly hanging inwards my habitation every bit piece of occupation of my Christmas decor.


If you’re looking for a GREAT gift for the crafter inwards your life, the Cricut Explore is my release i choice! And yous tin snuff it FREE transportation all Dec long amongst the code FREESHIPDEC at Cricut.com.

If yous similar Christmas sewing projects, live certain to cheque out my DIY Burlap Ornaments.


Comments
Post a Comment